[Tutorial] Win8 HTML5 app development- II
Finally I got the opportunity to write the second part of the tutorial series on HTML5 game development for Windows 8.
The first part can be read here.
Okay, so lets see what are we going to do today.
- First we'll port my game Bouncy to a Visual Studio 2012 project
- Add a paddle below he ball which will be controlled by Inclinometer sensor
Lets begin!
###PART 2: Writing your first sensor enabled Windows Store game###
To begin with the porting, we need the game source first which we'll fetch by cloning the game repository on github. I am using terminal to do so but you could use any possible way to clone it. If you are using the terminal too, run the following command:
git clone [email protected]:chinchang/Bouncy_HTML5.gitAfter you clone the repo, you should have a directory called Bouncy_HTML5 on your system containing 4 files out which we require index.html and game.js.
####Porting game to Visual Studio:####
Now lets fire up Visual Studio 2012. Once you have it running create a new project and select the Javascript > Windows Metro style > Blank App template for your project.

This will create a basic setup for an Windows Store HTML5 app ready to run on Window 8. You can check out the files that are created by the template for you in the right solution panel:

Our next step is to integrate our 2 files into the project. So basically first we integrate the markup (index.html) and then the JavaScript (game.js).
Open the default.html file present in your Visual Studio project and delete all the HTML present inside the BODY tag.
Now open up Bouncy_HTML5/index.html in your favourite text-editor (BTW, I use the awesome Sublime Text 2).
From there you only need to copy 2 lines (Yeah, just 2. Rest is all the extra stuff on the page) into default.html.
Copy the following line:
<canvas
  id="c"
  width="640"
  height="480"
  style=" border: 1px solid #AAA;"
></canvas>
and paste it inside the BODY tag.
Now back in the index.html file copy the following:
<script type="text/javascript" src="game.js"></script>and paste it where other SCRIPT tags are present in default.html. One thing you need to change here is the script path as our JavaScript file will now go in a sub-folder named js. Change the line to:
<script type="text/javascript" src="/js/game.js"></script>We are done with our HTML. Over to Javascript, developer.
Next we'll add Bouncy_HTML5/game.js to our project. Right-click on the js folder in the solution pane. Select Add > Existing Item then browse to Bouncy_HTML5/game.js and click Add as shown below:

Congratz, that file has now become part of your project. Now you can close the text editor and you have nothing to do with the Bouncy_HTML5 folder. You can delete it if you wish.
If you try to run the project by pressing F5, the game will run just fine. But we'll make a small tweak here.
If you happen to notice in game.js, we call a function called init() on window load event (Line 193). But in our new project we don't explicitly need to listen to window load event. In default.js file that was created with the project you'll see a code that looks like this around Line 13:
// TODO: This application has been newly launched. Initialize
// your application here.
This is essentially a position where we can execute any of our initialization code. But the issue here is that the init() function is inside an anonymous function and hence not available to outer world. It has to be first put in global scope to be able to call from default.js.
Back in game.js, modify the following line:
window.addEventListener("load", init);to
// create a global game object
window.game = window.game || {};

// set a reference to init function
window.game.init = init;
So now the function is accessible in global scope using window.game.init()
Switch back to default.js and call the init() function at the place we saw earlier. Your onactivated function should look like this now:
app.onactivated = function(args) {
  if (args.detail.kind === activation.ActivationKind.launch) {
    if (
      args.detail.previousExecutionState !==
      activation.ApplicationExecutionState.terminated
    ) {
      // TODO: This application has been newly launched. Initialize
      // your application here.
      window.game.init();
    } else {
      // TODO: This application has been reactivated from suspension.
      // Restore application state here.
    }
    args.setPromise(WinJS.UI.processAll());
  }
};
To verify your change, run the game by pressing F5 and it should work as before.
####Adding the paddle:####
Now that our game is completely ported we'll add paddle to it which will use the Inclinometer sensor to move.
As this tutorial doesn't focus on game development, rather using sensors for Windows Store game, we'll not dive into the code to implement the paddle. Simply download the new game-with-paddle.js file and replace the game.js code with its code:
Run your project and you should see a paddle on the screen and the balls bouncing on it. Lets make our paddle move, shall we?
####Enabling Inclinometer to move paddle:####
All the sensors in Windows Runtime (WinRT) are available under the namespace Windows.Devices.Sensors. The class we need to use is Windows.Devices.Sensors.Inclinometer.
In game.js, modify the following line:
var ball1, ball2, paddle;to
var ball1,
  ball2,
  paddle,
  sensor,
  max_roll = 20;
which creates a new variable to reference our sensor.
Next, in the init() function, put the following lines:
// get the reference to the Inclinometer sensor
try {
  sensor = Windows.Devices.Sensors.Inclinometer.getDefault();
} catch (e) {
  console.log("You don't have sensor support");
}
At this point we have initialized the Inclinometer. Now we need to read it to make the paddle move. Modify the paddle's update() function to following:
Paddle.prototype.update = function(dt) {
  if (sensor) {
    var reading = sensor.getCurrentReading();
    if (reading) {
      this.x = (canvas.width / 2) * (1 + reading.rollDegrees / max_roll);
    }
  }
};
All we do above is read the sensor's present reading (we are using the device roll amount here) and position the paddle according to it.
Run your project now and try tilting your Windows 8 device. Voila! You can now control the paddle using the device's Inclinometer sensor (if one exists). You can download the Visual Studio project at the following link:
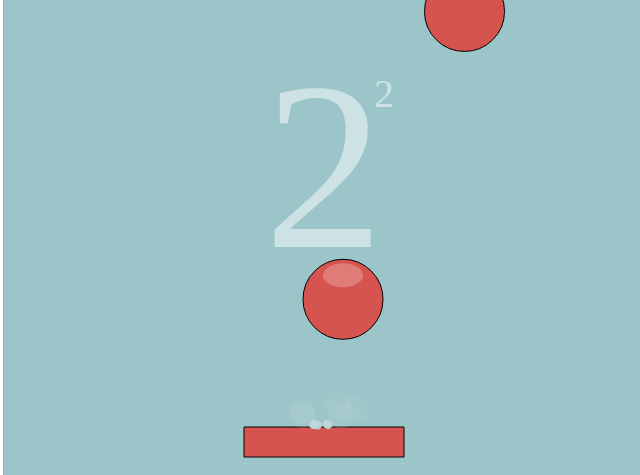
We are done with our first sensor enabled game ready to be put up on the Windows Store. If I find some more interesting stuff about Windows Store app development, I'll share it in my next post :) Till then, here is a screenshot of the game in action:
So go now and make your games sensor enabled and rule the world!
Cheers!