Case Study: Accessibility Report for Managers - Part 2
This is a two part case-study of why and how I created my recent side-project - Accessibility Report for Managers.
- Part 1 - Idea & Frontend
- Part 2 - Backend & Deployment
In the previous chapter, I took you through why I made Accessibility Report for Managers and the rationale behind it. Also, we saw how different parts of the frontend are created. In this chapter, I’ll take you into how the app works behind the scene - The Backend and how the complete app is deployed. Let’s dive in.
Backend
The Monorepo
Before getting into the backend, I would highlight the folder structure of this app. I use a Monorepo structure - which means the frontend and backend, both reside in the same repo as side-by-side folders. And as a general Lerna convention, I place them inside a "packages" folder. The frontend is in the /packages/app folder and backend in /packages/api.
Note: I am not using Lerna, just following its packages folder convention.
Getting the actual Accessibility issues
The whole basis of this app is first getting the real Accessibility issues on a particular website which we can later highlight by turning into fake feedbacks. For this, I wanted a library that could detect most Accessibility issues on a website, with easy setup and API. Out of the many, I chose to use pa11y. pa11y is an open-source Node.js library to find Accessibility issues on a webpage. Perfect for my case.
pa11y can run its tests on an actual Chrome browser or you can provide it a Puppeteer instance, which is basically headless Chrome. This part of the backend resides in a script: packages/api/generate.js. Input for this endpoint is just the URL of the webpage that we want to run the Accessibility tests on. This input is passed to the endpoint as a query parameter. We’ll later see how this script gets served as an API on a URL endpoint. generate.js just runs pa11y over the passed webpage URL and sends pa11y’s test results in the response.
You might be thinking where does pa11y get Chrome browser from. The complete backend is deployed on a serverless environment (I’ll cover this in more depth when we get to the deployment part). So I do not actually have a server that I control and can install Chrome browser on. This is where chrome-aws-lambda comes in. Consider it as a stripped-down Chrome browser specifically tailored for serverless environments (particularly AWS and Google Cloud).
Now that we have got the actual issues on a webpage, we pass them to the frontend as a JSON response. And we saw in the last chapter how these get processed and turned into fake feedbacks.
Showing the affected page element
If you try the app on a URL, you’ll notice that in each feedback tweet it also shows the image of the affected element on that page.
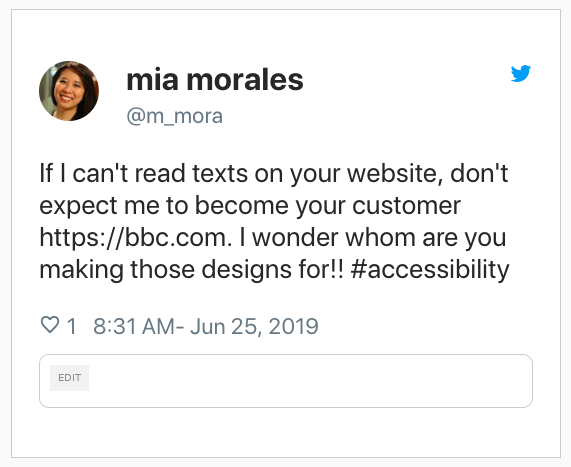
How does it do that?
Remember the result object we get from pa11y?
    {
      code: "WCAG2AA.Principle2.Guideline2_4.2_4_1.H64.1",
      message: "Iframe element requires a non-empty title attribute that identifies the frame.",
      type: "error",
      selector: "#77c8c1c1-74e9-4d61-be2e-c1e39ffe02a0"
    }
It also gives us the CSS selector of the page element that the Accessibility is found on. Now that we have the selector, how do we take an image of it? Enter Puppeteer.
Puppeteer is a high-level API to control a Chrome or Chromium browser (and now Firefox also). It runs the browser in headless mode by default - meaning the core of the browser runs without all the UI and visual stuff. Hence it is faster than running a normal browser instance.
Out of the several wonderful API options, there is one to grab a screenshot of any element on a URL. Now that we know this, it is time to create another API endpoint to generate the image for the affected page elements. As you can guess, this endpoint will require 2 things as input: a page URL and the CSS selector of the element. And it all happens inside packages/api/image.js.
Few things to note in this script:
-
We are decoding the passed CSS selector before using it, like so:
const selector = decodeURIComponent(queryData.selector);
The CSS selector is encoded on the frontend before sending as query parameter because it can contain URL-unsafe characters like#. -
This is a little different from a traditional API endpoint which you call asynchronously to get a JSON response. Firstly, it doesn’t send a JSON response. Note the following line in the script:
res.setHeader("Content-Type", image/png);We are setting the
Content-Typeheader for our response asimage/png. i.e. we are telling the browser to expect a PNG image from us. This is the same header value you’ll see in a usual PNG image. And how do you usually use a PNG image? In an<image>tag. That’s right, our API endpoint is designed such that it can be used in an<image>tag inside thesrcattribute. For example: if the endpoint is available on https://app.com/api/image and we want to generate screenshot image of an element on page https://targetpage.com having CSS selector as.avatar, we can do it like so:<image
src="https://app.com/api/image?url=https%3A%2F%2Ftargetpage.com&selector=.avatar"
></image>And our captured screenshot would show up in the image tag!
- Also, just like the pa11y script, I use
chrome-aws-lamdaas the Chrome instance because it is light-weight. And instead ofuppeteermodule, I usepuppeteer-corefor the same reason that it’s very minimal and light-weight. All these file size optimizations are necessary to take into account when you go with serverless architecture because you get a very limited amount of resources to run your code on. Of course, you can pay more and get on better resource plans, but you get my point.
That completes our backend - a set of 2 URL endpoints. One to get the issues on a webpage and second to generate a screenshot of any image on a webpage.
Deployment
I decided to try Zeit’s Now for this app. It let’s you deploy static files on a custom domain and also supports running many server-side languages in a serverless environment. No server management hassles, nothing. Absolutely a treat to deploy things on it.
I have 2 components of my app that will get deployed on Now - the frontend app and the backend APIs. How each component gets deployed on Now is defined in a file called now.json.
Frontend configuration
    {
      "version": 2,
      "builds": [
        {
          "src": "packages/app/package.json",
          "use": "@now/static-build",
          "config": {
            "distDir": "build"
          }
        }
      ],
      "routes": [
        {
          "src": "^/(.*)",
          "dest": "/packages/app/$1"
        }
      ]
    }
Notice a single entry in the build array. Its the configuration to deploy our frontend. What we are telling Now is:
- the path of our app (particularly the
package.jsonfile) - that it needs to build the app first, by specifying the
@now/static-buildbuilder - path to our final build folder, which is
buildin our case.
You also have the ability to define redirects in now.json which is a very powerful tool to create app routes, APIs, proxies and much more. Using the same, we define a route which tells Now to redirect every request to our just deployed frontend app. A very important thing to note here is the dest path we give in our route: /packages/app/$1. Now takes the contents of the distDir we provided in our build config, and makes it available inside the folder that is being built. So in our case here, the final build artifacts are available inside /packages/app.
Backend configuration
Just like put an entry in the builds array for our frontend app, we’ll put an entry for each of our API endpoint. First, our issue generation script: generate.js:
    {
      "version": 2,
      "builds": [
        {
          "src": "packages/app/package.json",
          "use": "@now/static-build",
          "config": {
            "distDir": "build"
          }
        },
        {
          "src": "packages/api/generate.js",
          "use": "@now/node",
          "config": { "maxLambdaSize": "40mb" }
        }
      ],
      "routes": [
        {
          "src": "^/api/generate.*",
          "dest": "/packages/api/generate.js"
        },
        {
          "src": "^/(.*)",
          "dest": "/packages/app/$1"
        }
      ]
    }
Same as before, we tell is the script to run, we tell it to use Node.js for it and finally some serverless environment config to limit the memory available to our code.
The total of 40mb memory size is why we need things like 'chrome-aws-lambda' and 'puppeteer-core' which provide us the absolute minimal version of their respective capabilities. Thus making them faster and lighter to run.
And then, we add a route to redirect any request on /api/generate.* to our generate.js script. Done!
Build config for the image.js script is similar and this is how our final now.json looks like:
    {
      "version": 2,
      "builds": [
        {
          "src": "packages/app/package.json",
          "use": "@now/static-build",
          "config": {
            "distDir": "build"
          }
        },
        {
          "src": "packages/api/generate.js",
          "use": "@now/node",
          "config": { "maxLambdaSize": "40mb" }
        },
        {
          "src": "packages/api/image.js",
          "use": "@now/node",
          "config": { "maxLambdaSize": "40mb" }
        }
      ],
      "routes": [
        {
          "src": "^/api/generate.*",
          "dest": "/packages/api/generate.js"
        },
        {
          "src": "^/api/image.*",
          "dest": "/packages/api/image.js"
        },
        {
          "src": "^/(.*)",
          "dest": "/packages/app/$1"
        }
      ]
    }
Whatever matches with the first 2 API routes, gets redirected to the respective scripts. Rest all requests get served from the app folder.
By default, your website gets served on a now.sh subdomain but you have the option to add a custom domain if you want.
And here is the final product → https://a11yformanagers.now.sh/
Remember, this app is open-source on Github → https://github.com/chinchang/a11y-for-managers
So if you want to get your hands dirty in open-source by making your first contribution, this app is perfect way to do it. Presently it has support to show only only few accessibility issues as tweets. You can add support for more types of Accessibility issues. And reach out to me for any help.
Hope you had fun reading and learnt a few new things along the way.